Cuckoo Installation
Baisc Info
- Host OS: Ubuntu 16.04 LST
- Guest OS: Windows 7 x64 Professional SP1
- Cuckoo: 2.0.5
- Virtualization software: VirtualBox 5.0.40
- Python Version: 2.7.14
- Python Virtual Environment: Conda
Installing Requirements on Host OS
Install Python libraries
|
|
Install MongoDB:
- 若要使用Django web界面,則需要安裝MongoDB1$ sudo apt-get install -y mongodb
Install tcpdump:
|
|
Install Volatility
- Volatility是記憶體的鑑識分析工具(forensic analysis),爲可選安裝
- Cuckoo利用Volatility檢查樣本是否有使用逃避Cuckoo分析的rootkit技術1$ sudo apt-get install -y volatility
Install M2Crypto
|
|
Network Configuration
- 因爲使用Host-only的虛擬網路模式,虛擬機只能通過Host OS才能訪問網路,所以Host OS需要有以下服務
- 流量轉發服務
- NAT機制
- DNS服務
流量轉發服務
123$ sudo vim /etc/sysctl.conf# Uncomment the next line to enable packet forwarding for IPv4net.ipv4.ip_forward=1使用iptables提供NAT機制
1234567891011$ sudo iptables -A FORWARD -o eth0 -i vboxnet0 -s 192.168.56.0/24 -m conntrack --ctstate NEW -j ACCEPT$ sudo iptables -A FORWARD -m conntrack --ctstate ESTABLISHED,RELATED -j ACCEPT$ sudo iptables -A POSTROUTING -t nat -j MASQUERADE$ sudo iptables -t nat -A POSTROUTING -o eth0 -s 192.168.56.0/24 -j MASQUERADE# 持久化iptables的設定$ sudo vim /etc/network/interfaces# 於文件最後新增下列兩行pre-up iptables-restore < /etc/iptables.rules # 開機時啓動iptables規則post-down iptables-save > /etc/iptables.rules # 關機前保存當前所有的iptables的規則DNS服務
12$ sudo apt-get install -y dnsmasq$ sudo service dnsmasq start
Installing Cuckoo on Host OS
Create a user
|
|
Install Cuckoo
|
|
Creation of the Virtual Machine
Create the Virtual Machine
- 本文章使用VirtualBox+Windows 7作爲虛擬機,此類文章可以依照網上的其他文章建立
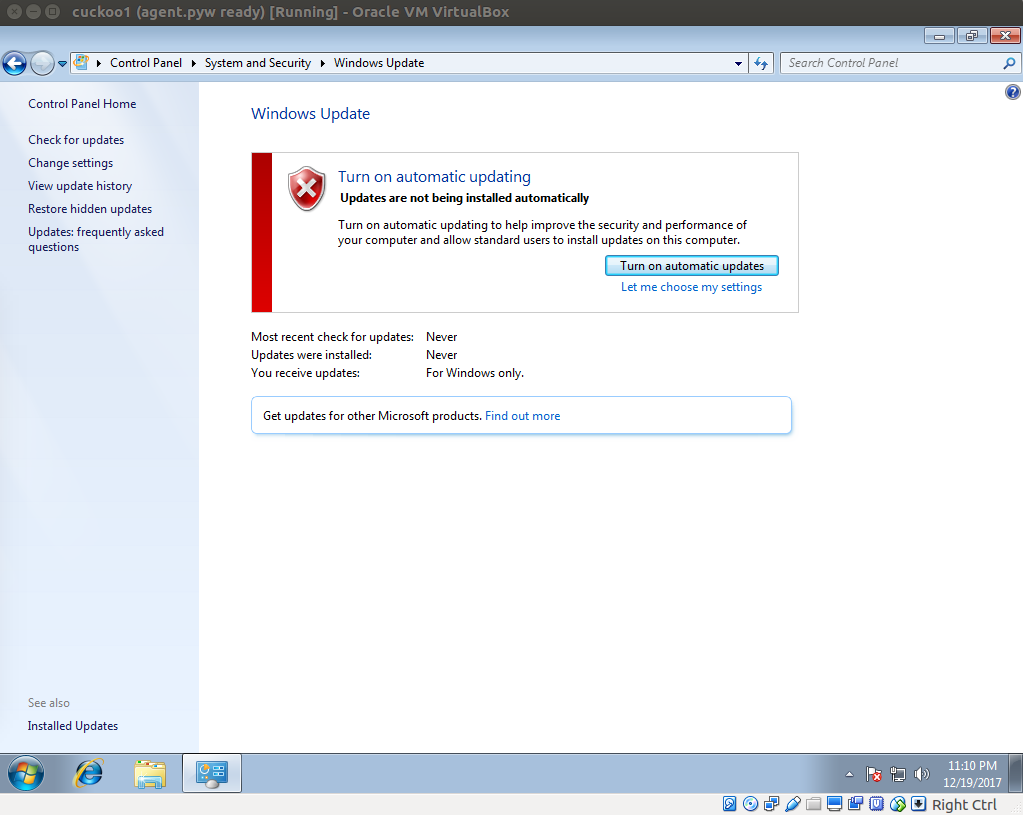
- 關閉Windows的自動更新功能
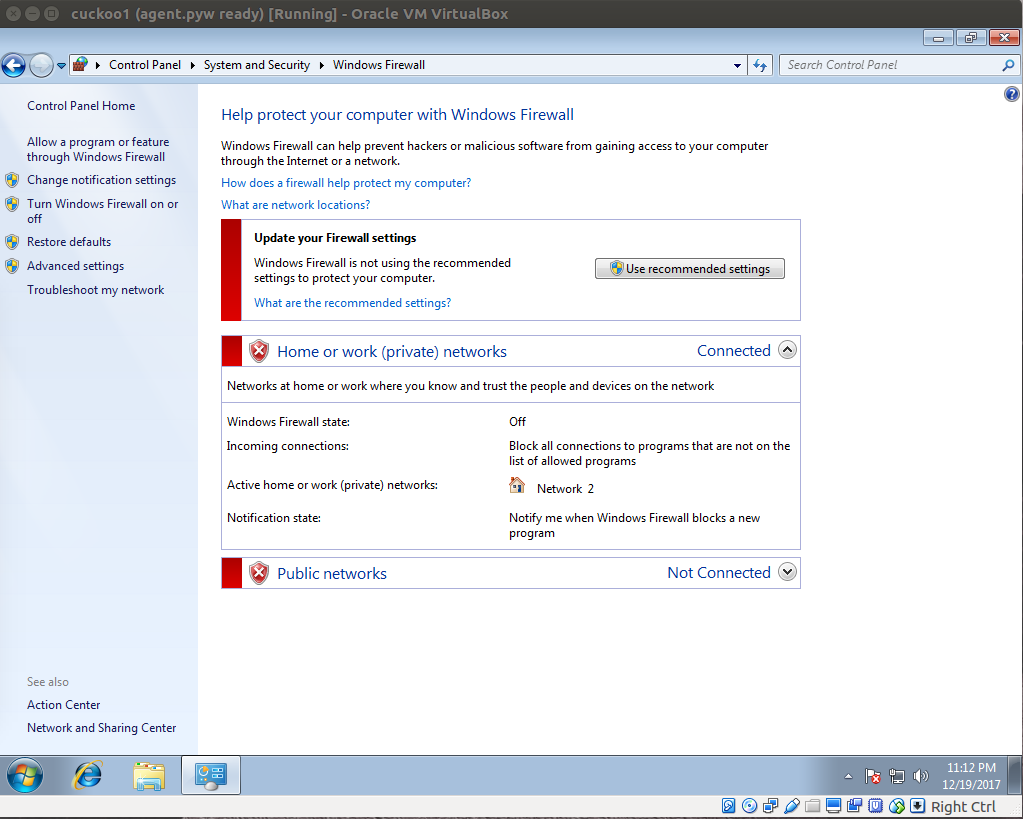
- 關閉Windows的防火牆功能
- 關閉Windows的UAC

- 可以額外在Guest OS(Windows 7)安裝PDF readers,Office,Adobe Flash,瀏覽器等可能觸發惡意樣本行爲的軟體,記得關閉軟體的自動更新功能
Install Requirements
- 下載Windows x86-64 MSI installer,並雙擊檔案進行安裝
將Python加入作業系統PAHT環境變數,預設python路徑在C:\Python27\

安裝Python Imaging Library (PIL)
1234567891011>cd C:\Python27\Scripts>pip install PillowCollecting PillowDownloading Pillow-4.3.0-cp27-cp27m-win32.whl (1.3MB100% |################################| 1.3MB 114kCollecting olefile (from Pillow)Downloading olefile-0.44.zip (74kB)100% |################################| 81kB 145kBInstalling collected packages: olefile, PillowRunning setup.py install for olefile ... doneSuccessfully installed Pillow-4.3.0 olefile-0.44
Guest OS Configuration
- 將Cuckoo的agent.py設定爲開機自啓動
- 該文件原始位置在Host OS的CWD子目錄中,預設在~/.cuckoo/agent/agent.py
- 將agent.py檔名修改爲agent.pyw,避免啓動時的執行視窗
- 將agent.pyw移入Guest OS的下列指定目錄內
- C:\Users[USER]\AppData\Roaming\MicroSoft\Windows\Start Menu\Programs\Startup\
- [USER]是指Windows user名稱
- 例如: C:\Users\analyzer\AppData\Roaming\Microsoft\Windows\Start Menu\Programs\Startup
- AppData爲隱藏目錄,記得打開顯示隱藏目錄的Windows選項
- 配置系統開機自動登入
- 使用Administrator權限啓動cmd,並依序在cmd中輸入以下指令
- [USERNAME]與[PASSWORD]需替換爲登入的Windows user與對應的password12345>reg add "hklm\software\Microsoft\Windows NT\CurrentVersion\WinLogon" /v DefaultUserName /d [USERNAME] /t REG_SZ /f>reg add "hklm\software\Microsoft\Windows NT\CurrentVersion\WinLogon" /v DefaultPassword /d [PASSWORD] /t REG_SZ /f>reg add "hklm\software\Microsoft\Windows NT\CurrentVersion\WinLogon" /v AutoAdminLogon /d 1 /t REG_SZ /f>reg add "hklm\system\CurrentControlSet\Control\TerminalServer" /v AllowRemoteRPC /d 0x01 /t REG_DWORD /f>reg add "HKEY_LOCAL_MACHINE\SOFTWARE\Microsoft\Windows\CurrentVersion\Policies\System" /v LocalAccountTokenFilterPolicy /d 0x01 /t REG_DWORD /f
Network Configuration
在Host OS下開啟Virtualbox的網路設定,新增一組HostOnly的網路介面 [vboxnet0]
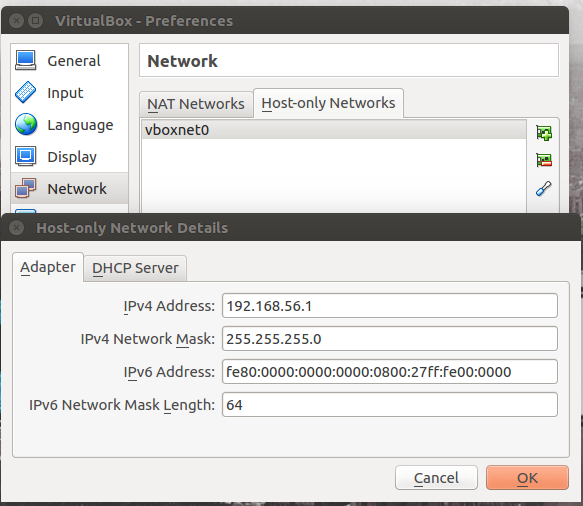
打開Guest OS的VirtualBox網路設定,指定使用HostOnly的網路介面 [vboxnet0]
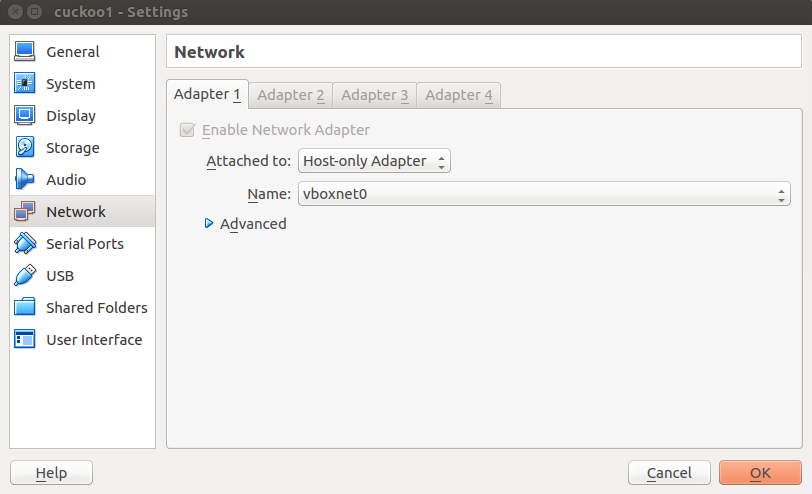
- 指定Guest OS內的網路設定
- Default geteway與Preferred DNS sever皆指定到HostOnly的IP
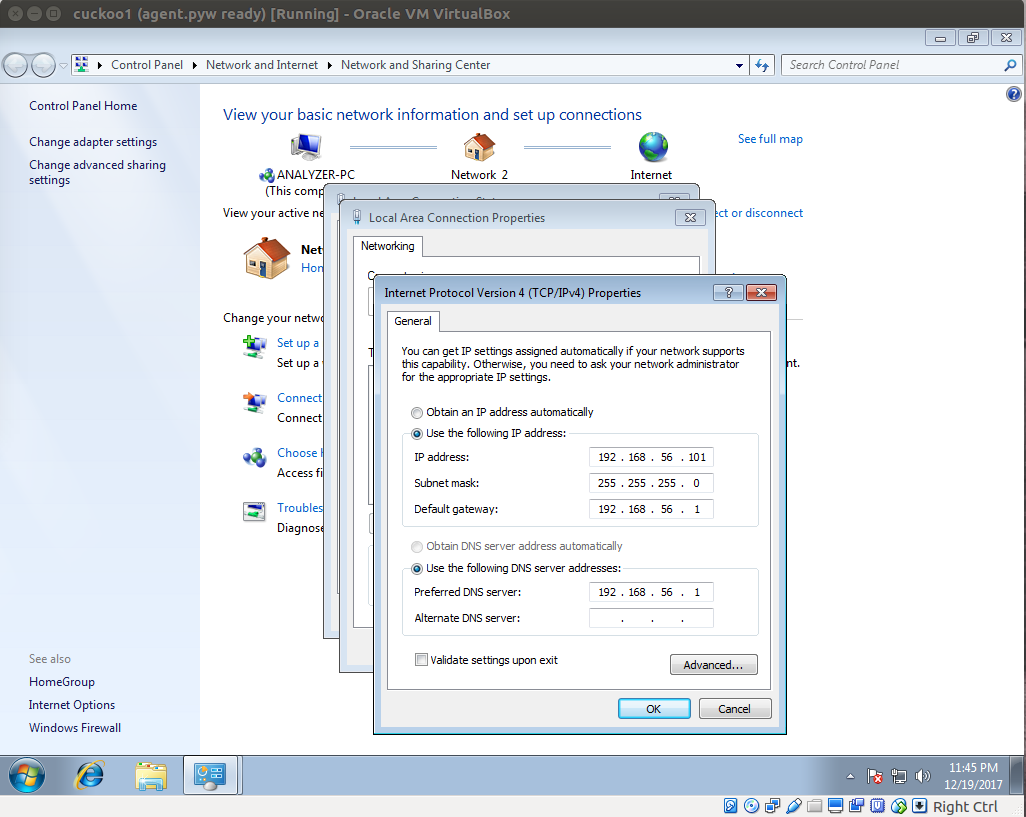
- Default geteway與Preferred DNS sever皆指定到HostOnly的IP
檢驗網路是否設定正確
Host OS
1$ ping 192.168.56.101Guest OS
12>ping 192.168.56.1>ping www.google.com
- 當Guest OS的設定與測試都正常後,請將虛擬機儲存一個snapshot
Cuckoo Configuration
- Cuckoo Configuration
- conf檔案放置在Host OS的CWD/conf中,預設在~/.cuckoo/conf
- 配置virtualbox.conf
|
|
- 配置reporting.conf
|
|
Usage Cuckoo
Starting Cuckoo
|
|
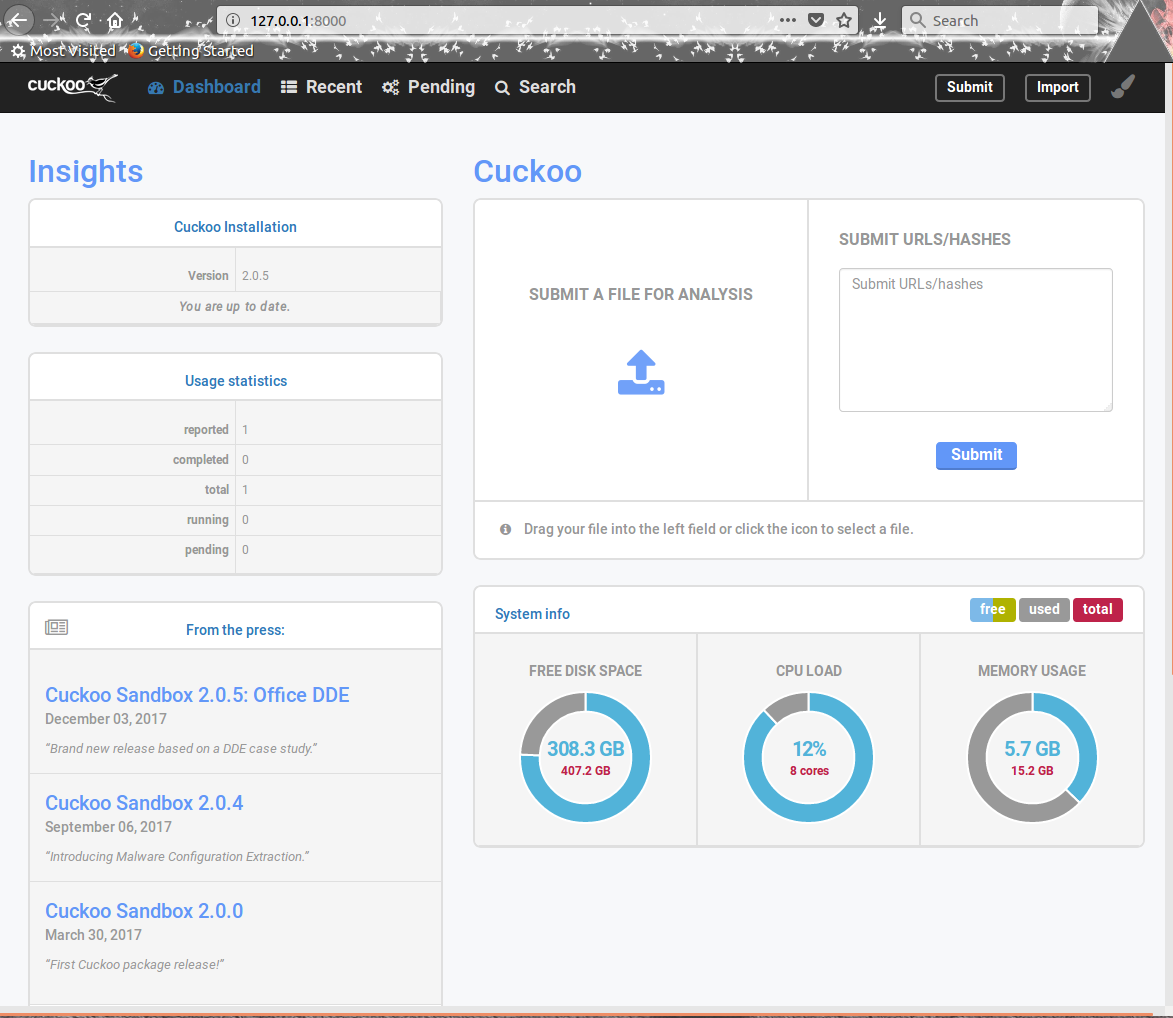
Web Interface
- 使用web上傳樣本進行分析1$ cuckoo web runserver