Cuckoo Installation

Cuckoo Installation

Baisc Info

  • Host OS: Ubuntu 16.04 LST
  • Guest OS: Windows 7 x64 Professional SP1
  • Cuckoo: 2.0.5
  • Virtualization software: VirtualBox 5.0.40
  • Python Version: 2.7.14
  • Python Virtual Environment: Conda
    • 本文章中所有的Host OS pip安裝皆在Conda虛擬環境中執行,以便於Python library管理
    • 不使用虛擬環境(Conda/Virtualenv),不影響Cuckoo的安裝與使用

Installing Requirements on Host OS

Install Python libraries

1
2
3
4
5
6
$ sudo apt-get install python python-pip python-dev libffi-dev libssl-dev
# 使用Conda作爲Python的虛擬環境(Virtual Environment),所以沒有安裝virtualenv的library
$ sudo apt-get install -y python-setuptools
$ sudo apt-get install -y libjpeg-dev zlib1g-dev swig
# 安裝pillow所需library
$ sudo apt-get install -y libtiff5-dev libjpeg8-dev libfreetype6-dev liblcms2-dev libwebp-dev tcl8.6-dev tk8.6-dev python-tk

Install MongoDB:

  • 若要使用Django web界面,則需要安裝MongoDB
    1
    $ sudo apt-get install -y mongodb

Install tcpdump:

1
2
3
4
5
6
7
8
9
10
11
12
13
$ sudo apt-get install -y apparmor-utils
# 若使用預設的CWD目錄(~/.cuckoo),則要禁用AppArmor對tcpdump的安全配置,否則AppArmor會阻止PCAP文件的創建
$ sudo aa-disable /usr/sbin/tcpdump
$ sudo apt-get install tcpdump
# tcpdump執行需要root權限,若不想讓Cuckoo使用root權限執行,那麼可以使用下列指令設定
$ sudo setcap cap_net_raw,cap_net_admin=eip /usr/sbin/tcpdump
# 驗證上列指令
$ getcap /usr/sbin/tcpdump
/usr/sbin/tcpdump = cap_net_admin,cap_net_raw+eip
# 若沒有setcap指令,可以使用下列指令安裝
$ sudo apt-get install libcap2-bin

Install Volatility

  • Volatility是記憶體的鑑識分析工具(forensic analysis),爲可選安裝
  • Cuckoo利用Volatility檢查樣本是否有使用逃避Cuckoo分析的rootkit技術
    1
    $ sudo apt-get install -y volatility

Install M2Crypto

1
$ sudo pip install m2crypto==0.24.0

Network Configuration

  • 因爲使用Host-only的虛擬網路模式,虛擬機只能通過Host OS才能訪問網路,所以Host OS需要有以下服務
    • 流量轉發服務
    • NAT機制
    • DNS服務
  • 流量轉發服務

    1
    2
    3
    $ sudo vim /etc/sysctl.conf
    # Uncomment the next line to enable packet forwarding for IPv4
    net.ipv4.ip_forward=1
  • 使用iptables提供NAT機制

    1
    2
    3
    4
    5
    6
    7
    8
    9
    10
    11
    $ sudo iptables -A FORWARD -o eth0 -i vboxnet0 -s 192.168.56.0/24 -m conntrack --ctstate NEW -j ACCEPT
    $ sudo iptables -A FORWARD -m conntrack --ctstate ESTABLISHED,RELATED -j ACCEPT
    $ sudo iptables -A POSTROUTING -t nat -j MASQUERADE
    $ sudo iptables -t nat -A POSTROUTING -o eth0 -s 192.168.56.0/24 -j MASQUERADE
    # 持久化iptables的設定
    $ sudo vim /etc/network/interfaces
    # 於文件最後新增下列兩行
    pre-up iptables-restore < /etc/iptables.rules # 開機時啓動iptables規則
    post-down iptables-save > /etc/iptables.rules # 關機前保存當前所有的iptables的規則
  • DNS服務

    1
    2
    $ sudo apt-get install -y dnsmasq
    $ sudo service dnsmasq start

Installing Cuckoo on Host OS

Create a user

1
2
3
$ sudo adduser cuckoo
# 將cuckoo user加入vboxusers group,需先安裝VirtualBox
$ sudo usermod -a -G vboxusers cuckoo

Install Cuckoo

1
2
$ pip install -U pip setuptools
$ pip install cuckoo

Creation of the Virtual Machine

Create the Virtual Machine

  • 本文章使用VirtualBox+Windows 7作爲虛擬機,此類文章可以依照網上的其他文章建立
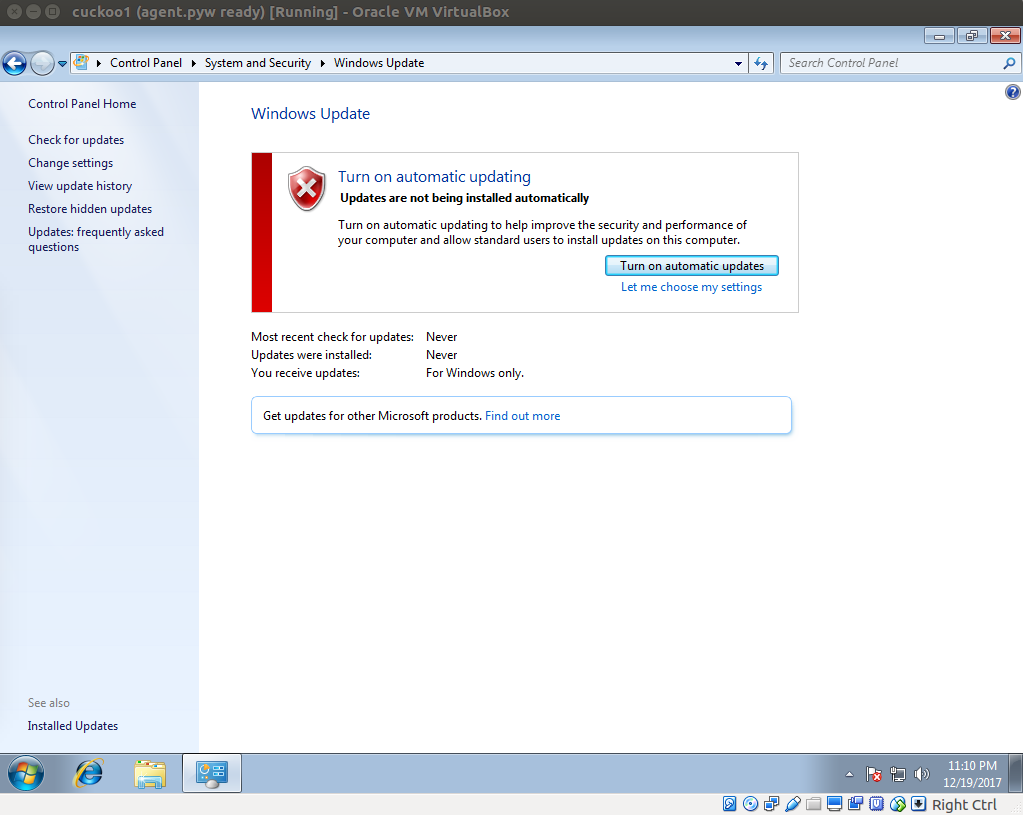
  • 關閉Windows的自動更新功能
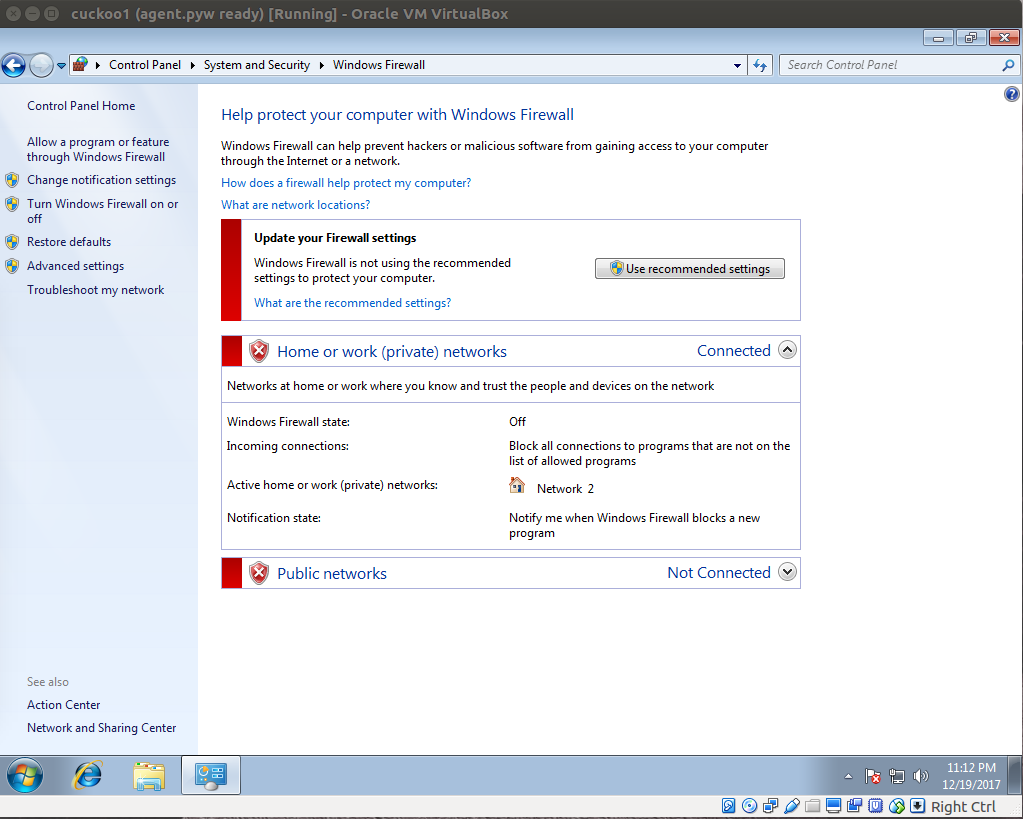
  • 關閉Windows的防火牆功能
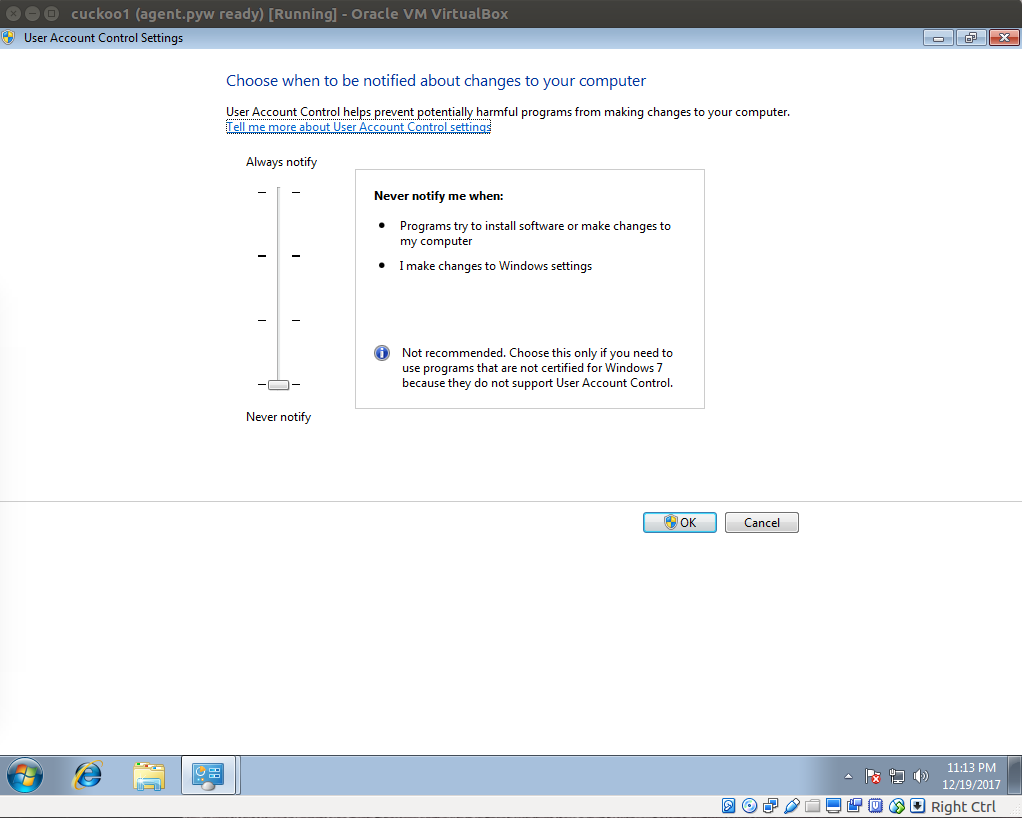
  • 關閉Windows的UAC
  • 可以額外在Guest OS(Windows 7)安裝PDF readers,Office,Adobe Flash,瀏覽器等可能觸發惡意樣本行爲的軟體,記得關閉軟體的自動更新功能

Install Requirements

  • 下載Windows x86-64 MSI installer,並雙擊檔案進行安裝
  • 將Python加入作業系統PAHT環境變數,預設python路徑在C:\Python27\

  • 安裝Python Imaging Library (PIL)

    1
    2
    3
    4
    5
    6
    7
    8
    9
    10
    11
    >cd C:\Python27\Scripts
    >pip install Pillow
    Collecting Pillow
    Downloading Pillow-4.3.0-cp27-cp27m-win32.whl (1.3MB
    100% |################################| 1.3MB 114k
    Collecting olefile (from Pillow)
    Downloading olefile-0.44.zip (74kB)
    100% |################################| 81kB 145kB
    Installing collected packages: olefile, Pillow
    Running setup.py install for olefile ... done
    Successfully installed Pillow-4.3.0 olefile-0.44

Guest OS Configuration

  • 將Cuckoo的agent.py設定爲開機自啓動
    • 該文件原始位置在Host OS的CWD子目錄中,預設在~/.cuckoo/agent/agent.py
    • 將agent.py檔名修改爲agent.pyw,避免啓動時的執行視窗
    • 將agent.pyw移入Guest OS的下列指定目錄內
      • C:\Users[USER]\AppData\Roaming\MicroSoft\Windows\Start Menu\Programs\Startup\
      • [USER]是指Windows user名稱
      • 例如: C:\Users\analyzer\AppData\Roaming\Microsoft\Windows\Start Menu\Programs\Startup
      • AppData爲隱藏目錄,記得打開顯示隱藏目錄的Windows選項
  • 配置系統開機自動登入
    • 使用Administrator權限啓動cmd,並依序在cmd中輸入以下指令
    • [USERNAME]與[PASSWORD]需替換爲登入的Windows user與對應的password
      1
      2
      3
      4
      5
      >reg add "hklm\software\Microsoft\Windows NT\CurrentVersion\WinLogon" /v DefaultUserName /d [USERNAME] /t REG_SZ /f
      >reg add "hklm\software\Microsoft\Windows NT\CurrentVersion\WinLogon" /v DefaultPassword /d [PASSWORD] /t REG_SZ /f
      >reg add "hklm\software\Microsoft\Windows NT\CurrentVersion\WinLogon" /v AutoAdminLogon /d 1 /t REG_SZ /f
      >reg add "hklm\system\CurrentControlSet\Control\TerminalServer" /v AllowRemoteRPC /d 0x01 /t REG_DWORD /f
      >reg add "HKEY_LOCAL_MACHINE\SOFTWARE\Microsoft\Windows\CurrentVersion\Policies\System" /v LocalAccountTokenFilterPolicy /d 0x01 /t REG_DWORD /f

Network Configuration

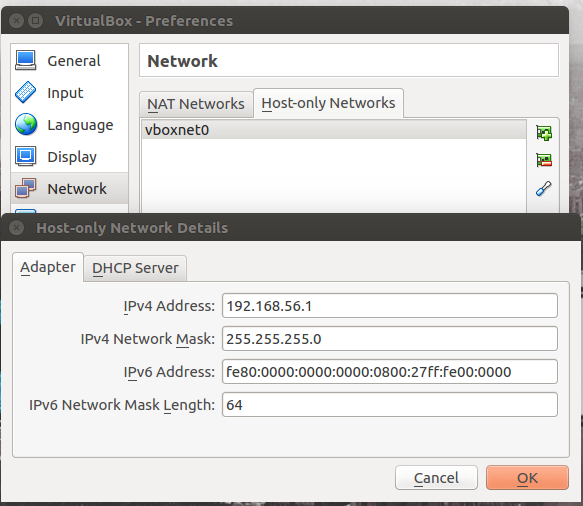
  • 在Host OS下開啟Virtualbox的網路設定,新增一組HostOnly的網路介面 [vboxnet0]
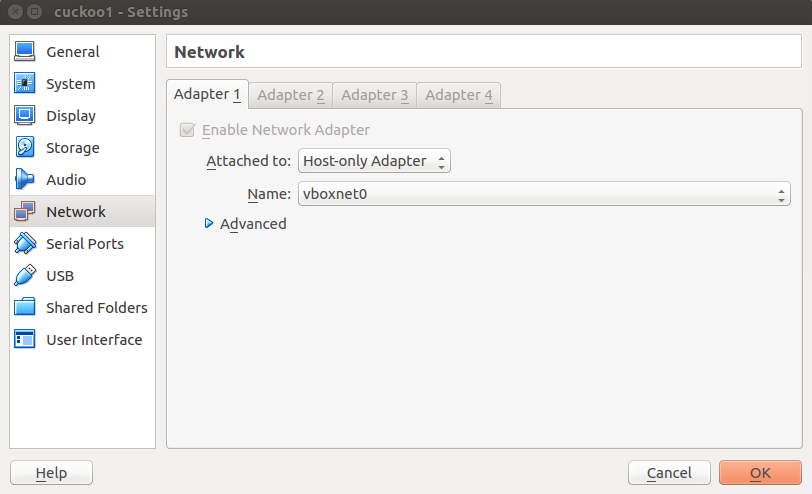
  • 打開Guest OS的VirtualBox網路設定,指定使用HostOnly的網路介面 [vboxnet0]
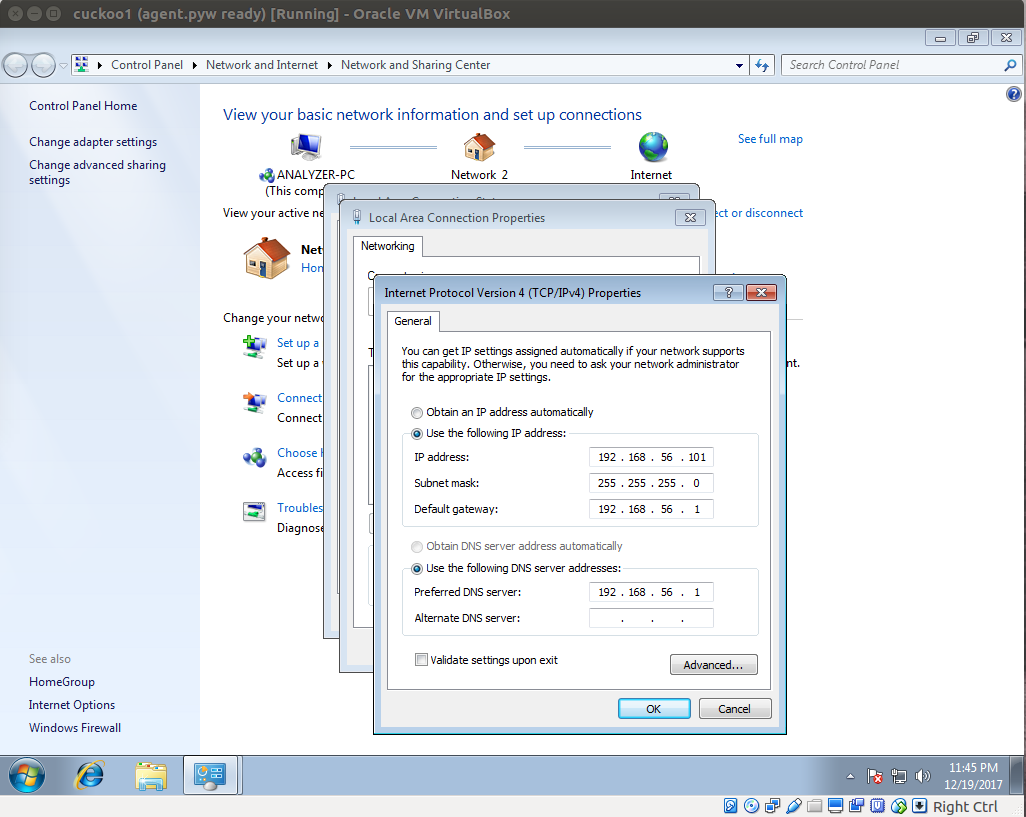
  • 指定Guest OS內的網路設定
    • Default geteway與Preferred DNS sever皆指定到HostOnly的IP
  • 檢驗網路是否設定正確

    • Host OS

      1
      $ ping 192.168.56.101
    • Guest OS

      1
      2
      >ping 192.168.56.1
      >ping www.google.com
  • 當Guest OS的設定與測試都正常後,請將虛擬機儲存一個snapshot

Cuckoo Configuration

  • Cuckoo Configuration
  • conf檔案放置在Host OS的CWD/conf中,預設在~/.cuckoo/conf
  • 配置virtualbox.conf
1
2
3
4
5
6
7
8
9
10
11
12
13
14
15
16
17
18
19
20
$ vim virtualbox.conf
# Specify a comma-separated list of available machines to be used. For each
# specified ID you have to define a dedicated section containing the details
# on the respective machine. (E.g. cuckoo1,cuckoo2,cuckoo3)
machines = cuckoo1 # 指定VirtualBox中Geust OS的虛擬機名稱
[cuckoo1] # 對應machines
# Specify the label name of the current machine as specified in your
# VirtualBox configuration.
label = cuckoo1
# Specify the operating system platform used by current machine
# [windows/darwin/linux].
platform = windows
# Specify the IP address of the current virtual machine. Make sure that the
# IP address is valid and that the host machine is able to reach it. If not,
# the analysis will fail.
ip = 192.168.56.101 # 指定VirtualBox中Geust OS的IP位置
  • 配置reporting.conf
1
2
3
4
5
6
7
8
9
10
11
12
13
14
15
16
17
18
19
20
21
$ vim reporting.conf
[jsondump]
enabled = yes # no -> yes
indent = 4
calls = yes
[singlefile]
# Enable creation of report.html and/or report.pdf?
enabled = yes # no -> yes
# Enable creation of report.html?
html = yes # no -> yes
# Enable creation of report.pdf?
pdf = yes # no -> yes
[mongodb]
enabled = yes # no -> yes
host = 127.0.0.1
port = 27017
db = cuckoo
store_memdump = yes
paginate = 100

Usage Cuckoo

Starting Cuckoo

1
2
3
4
5
6
7
8
9
10
11
12
13
14
15
16
17
18
19
20
21
22
23
24
25
26
27
28
29
30
31
32
33
34
35
36
37
38
39
40
41
42
43
44
$ cuckoo
_______ _____ _____
/::\ \ /\ \ /\ \
/::::\ \ /::\____\ /::\ \
/::::::\ \ /::::| | /::::\ \
/::::::::\ \ /:::::| | /::::::\ \
/:::/~~\:::\ \ /::::::| | /:::/\:::\ \
/:::/ \:::\ \ /:::/|::| | /:::/ \:::\ \
/:::/ / \:::\ \ /:::/ |::| | /:::/ \:::\ \
/:::/____/ \:::\____\ /:::/ |::|___|______ /:::/ / \:::\ \
|:::| | |:::| | /:::/ |::::::::\ \ /:::/ / \:::\ ___\
|:::|____| |:::| |/:::/ |:::::::::\____\/:::/____/ ___\:::| |
\:::\ \ /:::/ / \::/ / ~~~~~/:::/ /\:::\ \ /\ /:::|____|
\:::\ \ /:::/ / \/____/ /:::/ / \:::\ /::\ \::/ /
\:::\ /:::/ / /:::/ / \:::\ \:::\ \/____/
\:::\__/:::/ / /:::/ / \:::\ \:::\____\
\::::::::/ / /:::/ / \:::\ /:::/ /
\::::::/ / /:::/ / \:::\/:::/ /
\::::/ / /:::/ / \::::::/ /
\::/____/ /:::/ / \::::/ /
~~ \::/ / \::/____/
\/____/
it's Cuckoo!
Cuckoo Sandbox 2.0.5
www.cuckoosandbox.org
Copyright (c) 2010-2017
=======================================================================
Welcome to Cuckoo Sandbox, this appears to be your first run!
We will now set you up with our default configuration.
You will be able to see and modify the Cuckoo configuration,
Yara rules, Cuckoo Signatures, and much more to your likings
by exploring the /home/albert/.cuckoo directory.
Among other configurable items of most interest is the
new location for your Cuckoo configuration:
/home/albert/.cuckoo/conf
=======================================================================
Cuckoo has finished setting up the default configuration.
Please modify the default settings where required and
start Cuckoo again (by running `cuckoo` or `cuckoo -d`).

Web Interface

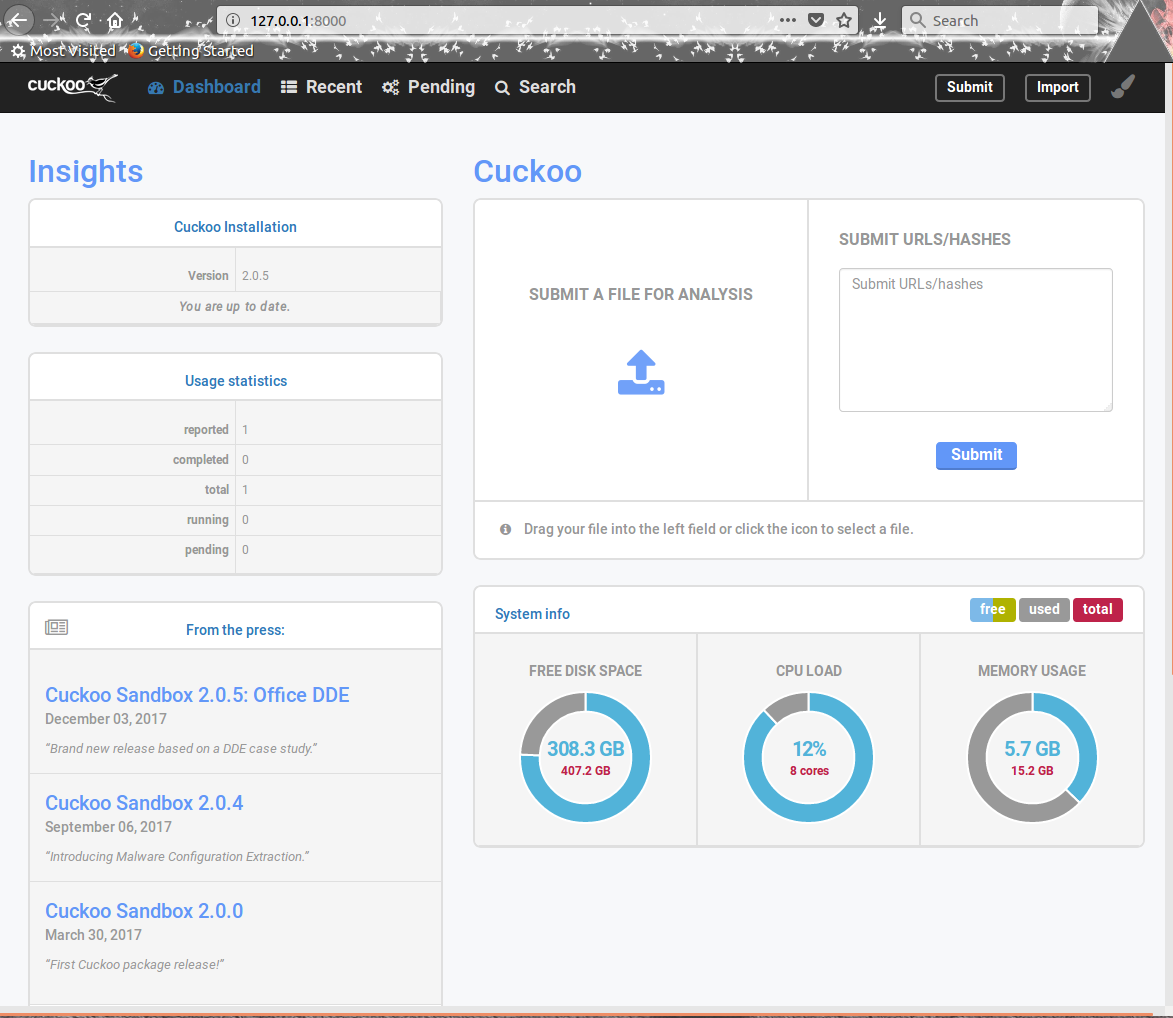
  • 使用web上傳樣本進行分析
    1
    $ cuckoo web runserver


Reference